Screenshots How to
Photograph Vintage Color Television
Introduction. As
restoration and calibration of my ragtag mutt progresses, it becomes more
important to call on past photography experience to share my progress and
setbacks. In another section of this site, I have laid out some of my
life as it related to the primary subject: CT-100 restoration. Left out however was experience ‘shooting’ magazine and book
covers. Actually, shooting is simply a term for a very complicated
process that stresses huge helpings of both artistic and technical talent
combined with a big dollop of win- and lose-based experience. What talent I may or may not have I leave to the evaluation
of others. What I can call on is experience gleaned from over two-hundred
newsstand magazine and trade book covers. Some of those covers, I have learned
with some modicum of pride, are in magazine collections of CT-100 owners.
Buried in a shelf overlooking the main floor of the ancient Asbury Park (where
I live) library are bound collections of magazines from the ‘70’s with my name,
fingerprints, and sweat all over the insides and covers. Well, maybe sweat is
too strong a term; it was always too much fun. A Little Background.
A newsstand magazine cover is a point-of-sale advertisement. It says here I am.
Look at me. Pick me up. Here’s what’s in me. Reach for your wallet. To turn casual curiosity into cash-on-the-counter, you need
a catchy picture, bold cover lines, and talented people to put it all together.
Some would probably be surprised at how much planning detail and time goes into
shooting a cover photo. I once came up with an idea to mimic an engineering
drawing with its top, front, and side (orthogonal) views. Instead of drawing
the subject (a small build-it-yourself gadget), I wanted to photograph the
three views, arrange the photos to mimic a blueprint, and hope it sold a
magazine. When the cover art director approached the photographer with the
scheme, the photographer scratched his head a bit and solved an unusual
problem. Instead of shooting the pictures with his professional 4x5
bellows camera, he rented a 1000-mm lens for his 35-mm camera, put the gadget
in one end of his main studio, walked through a hallway to his smaller studio,
and set up there. Distance? There were probably
between 40 and 50 feet between the gadget and camera. [BTW, it was on the fifth
floor of movie mogul Mike Todd’s former mid-Manhattan townhouse.] But I
digress. Why did Lenny the photographer go to all that trouble? Parallax. He knew the bellows camera close to a small
rectangular box wouldn’t look exactly, maybe subliminally, right in a
photograph that was to depict just two dimensions. What detail. What a lesson
for me. Setup. This is not the subject of this discourse, but before you
can expect superior results, you need a superlative picture. Does the picture
meet standards of gray scale? Does it have adequate color? How’s the contrast?
What is the room illumination like? What is your video source? A cable signal
overloading the front end creating impedance issues, swamping the tuner with a
120-channel wideband onslaught, and generally causing swirly things to happen
on the screen, is not your first choice. Certainly over-the-air NTSC is not the
ubiquitous thing it once was, but it gives me a warm fuzzy. I gotta believe the
chief engineer at my local VHF or UHF channel is doing right by FCC technical
standards. Whenever possible, I use over the air signals. ■ Do not photograph your set
in a room full of light. Turn off the lights. Pull the blackout shades, or
whatever. You must control the room light, and the room must be dark. ■ Do not use flash. Do not
use flash. Do not use flash. You might think this would be obvious, but
remember, the television picture tube is creating the
light you want to photograph. You are not photographing reflected light. You
are photographing incident light. You must expose your film or CCD with light
from the glowing phosphor in the CRT. Sure, I always use the automatic exposure feature in my El
Cheapo digital camera. Set up a manual exposure if you wish. But for the
automatic exposure shots, it’s best to use a tripod or stabilize your camera
against a wall or some fixed object. The camera I use requires a relatively
long exposure, which causes two problems: you smear the picture from your
movement and the video picture smears easily from video motion. Using a tripod
eliminates the first smear; your selection of the video subject helps control
the second. Taking. Take lots of pictures. That shot on the cover of the
magazine I started in 1976 is the one winning shot from five rolls of
36-exposure 35-mm film. The setup for that shot took days. Imagine the model,
the location, the model’s outfits, the location setup, the actual shooting, and
the sifting process to find the one right shot for a magazine cover that says,
“Reach for your wallet.” So, take lots of pictures. Subject: what to shoot?
If we begin with color bars, the basic technical test signal, we can develop
subject matter that will show off our vintage color television well. The modern
color bar test pattern displays three primary colors, two colors developed by
mixing primaries, and the absence and presence of primaries, or black and
white. Professional bars use the following white-to-black progression: white-yellow-cyan-green-magenta-red-blue-black As an integral element of color, luminance also maintains a
white-to-black progression: white-grAy6- grAy5- grAy4- grAy3- grAy2- grAy1-black Color bar position depends upon the luminance level of that
color. The color bar pattern is striking in that it contains broad areas of a
given color. They are bright, pure, and near saturation, neither pale nor
mottled. So, can we show off our prize in the best possible light if we select
program material that reflects color bar characteristics? I think so. One bit of programming that matches those requirements is
animation. It has large areas of color. Usually, you can find a couple of
frozen frames to expose for maximum sharpness. If you also want to shoot screen shots with live video, look
for sets and shots with large areas of continuous color. Check brightness
levels when you change channels. A soap opera shot in HD and transmitted in
NTSC appears to have lower overall brightness than, say, my local news team
broadcasts. I have no technical evidence to offer, it’s just an observation.
One way or the other, you want to show off your vintage tube, and so make the
setup part of each new series of exposures. Finally: If you take a
picture and ‘touch it up’ with Photoshop or something, let me know. Better yet,
don’t retouch it. If it’s not right as taken, take it again and again till you
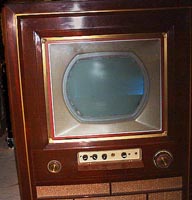
get it right. I illustrate this little tome with just one shot taken this
morning,
--Pete Deksnis
|

